"如何利用kvm/qemu練習linux module"將介紹如何編譯一個bzImage在kvm上面執行,我們將掛上一個initramfs當我們的root filesystem,除了沒有實體的裝置以外,其實可以看成一個embedded linux了。我也是利用這種方式撰寫module的文章,因為module一寫不好,kernel就會crash了,透過vm,就不怕kernel crash了。
編譯kernel
brook@ubuntu:~$ mkdir linux
brook@ubuntu:~$ cd linux/
brook@ubuntu:~/linux$ apt-get source linux-image-2.6.31-16-generic
Reading package lists... Done
Building dependency tree
Reading state information... Done
NOTICE: 'linux' packaging is maintained in the 'Git' version control system at:
http://kernel.ubuntu.com/git-repos/ubuntu/ubuntu-karmic.git
Need to get 81.0MB of source archives.
Get:1 http://tw.archive.ubuntu.com karmic-updates/main linux 2.6.31-16.53 (dsc) [3,781B]
0% [Waiting for headers]
Fetched 81.0MB in 3min 29s (387kB/s)
gpgv: Signature made Tue 08 Dec 2009 11:50:10 AM CST using DSA key ID 17063E6D
gpgv: Can't check signature: public key not found
dpkg-source: warning: failed to verify signature on ./linux_2.6.31-16.53.dsc
dpkg-source: info: extracting linux in linux-2.6.31
dpkg-source: info: unpacking linux_2.6.31.orig.tar.gz
dpkg-source: info: applying linux_2.6.31-16.53.diff.gz
brook@ubuntu:~/linux$ cd linux-2.6.31
brook@ubuntu:~/linux/linux-2.6.31$ cp /boot/config-2.6.31-16-generic .config
brook@ubuntu:~/linux/linux-2.6.31$ make oldconfig
brook@ubuntu:~/linux/linux-2.6.31$ make menuconfig
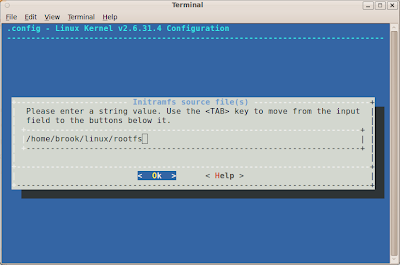
接下來要設定我們的initramfs的目錄,先make menuconfig,接著選"General setup" -> "Initramfs source file(s)",接著輸入目錄"/home/brook/linux/rootfs",注意該選項的上一個選項"Initial RAM ilesystem and RAM disk (initramfs/initrd) support"有被enabled。如果要使用的是initrd則"Initramfs source file(s)"就留空白,使用initrd的好處是,initrd有任何改變都不需要重新compile kernel。

rootfs的基本設定
brook@ubuntu:~/linux$ mkdir rootfs
brook@ubuntu:~/linux$ cd rootfs
brook@ubuntu:~/linux/rootfs$ mkdir dev
brook@ubuntu:~/linux/rootfs$ mkdir tmp
brook@ubuntu:~/linux/rootfs$ mkdir bin
brook@ubuntu:~/linux/rootfs$ mkdir sbin
brook@ubuntu:~/linux/rootfs$ mkdir etc
brook@ubuntu:~/linux/rootfs$ mkdir lib
brook@ubuntu:~/linux/rootfs$ mkdir proc
brook@ubuntu:~/linux/rootfs$ mkdir sys
brook@ubuntu:~/linux/rootfs$ mkdir usr
brook@ubuntu:~/linux/rootfs$ apt-get install busybox-static
brook@ubuntu:~/linux/rootfs$ cp /bin/busybox bin
brook@ubuntu:~/linux/rootfs$ cd bin
brook@ubuntu:~/linux/rootfs/bin$ ln -s busybox -s mkdir
brook@ubuntu:~/linux/rootfs/bin$ ln -s busybox -s mknod
brook@ubuntu:~/linux/rootfs/bin$ ln -s busybox -s mount
brook@ubuntu:~/linux/rootfs/bin$ ln -s busybox -s rm
brook@ubuntu:~/linux/rootfs/bin$ ln -s busybox -s sh
brook@ubuntu:~/linux/rootfs/bin$ cd ../sbin
brook@ubuntu:~/linux/rootfs/sbin$ ln -s ../busybox -s init
brook@ubuntu:~/linux/rootfs/sbin$ ln -s ../busybox -s mdev
brook@ubuntu:~/linux/rootfs/$ find . |cpio -H newc -o > ../initrd
如果使用的是initrd則需要用cpio壓縮這個目錄,如果是initramfs就不用最後一個指令了。
接著當然還要寫一下init script,負責開機後的一些基本設定,其內容如下
#!/bin/sh
#Mount things needed by this script
mount -t tmpfs -o size=64k,mode=0755 tmpfs /dev
mkdir /dev/pts
mount -t devpts devpts /dev/pts
/bin/mount -t proc proc /proc
/bin/mount -t sysfs sysfs /sys

#Create all the symlinks to /bin/busybox
/bin/busybox --install -s

#Create device nodes
echo /sbin/mdev > /proc/sys/kernel/hotplug
/sbin/mdev -s

exec /sbin/init
最後make bzImage即可。
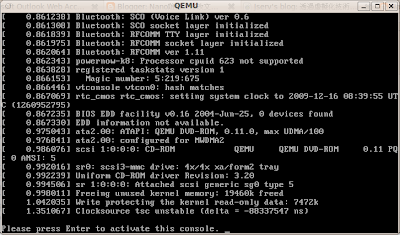
接著執行kvm/qemu吧
brook@ubuntu:~/linux/linux-2.6.31$ kvm -no-acpi -kernel arch/x86_64/boot/bzImage -net nic,model=pcnet -net tap,ifname=tap0,script=no
如果是initrd則需要多一個參數給kvm/qemu。
brook@ubuntu:~/linux/linux-2.6.31$ kvm -no-acpi -kernel arch/x86_64/boot/bzImage -initrd /home/brook/initrd -net nic,model=pcnet -net tap,ifname=tap0,script=no


